> ## Documentation Index
> Fetch the complete documentation index at: https://bruno-a6972042-mintlify-ws-multi-message-1777871287.mintlify.site/llms.txt
> Use this file to discover all available pages before exploring further.
# WebSocket Request Interface
The WebSocket request interface consists of several key components:
 ## Request Interface
### Connection Status
* **Disconnected**: Initial state, ready to connect
* **Connecting**: Establishing connection to server
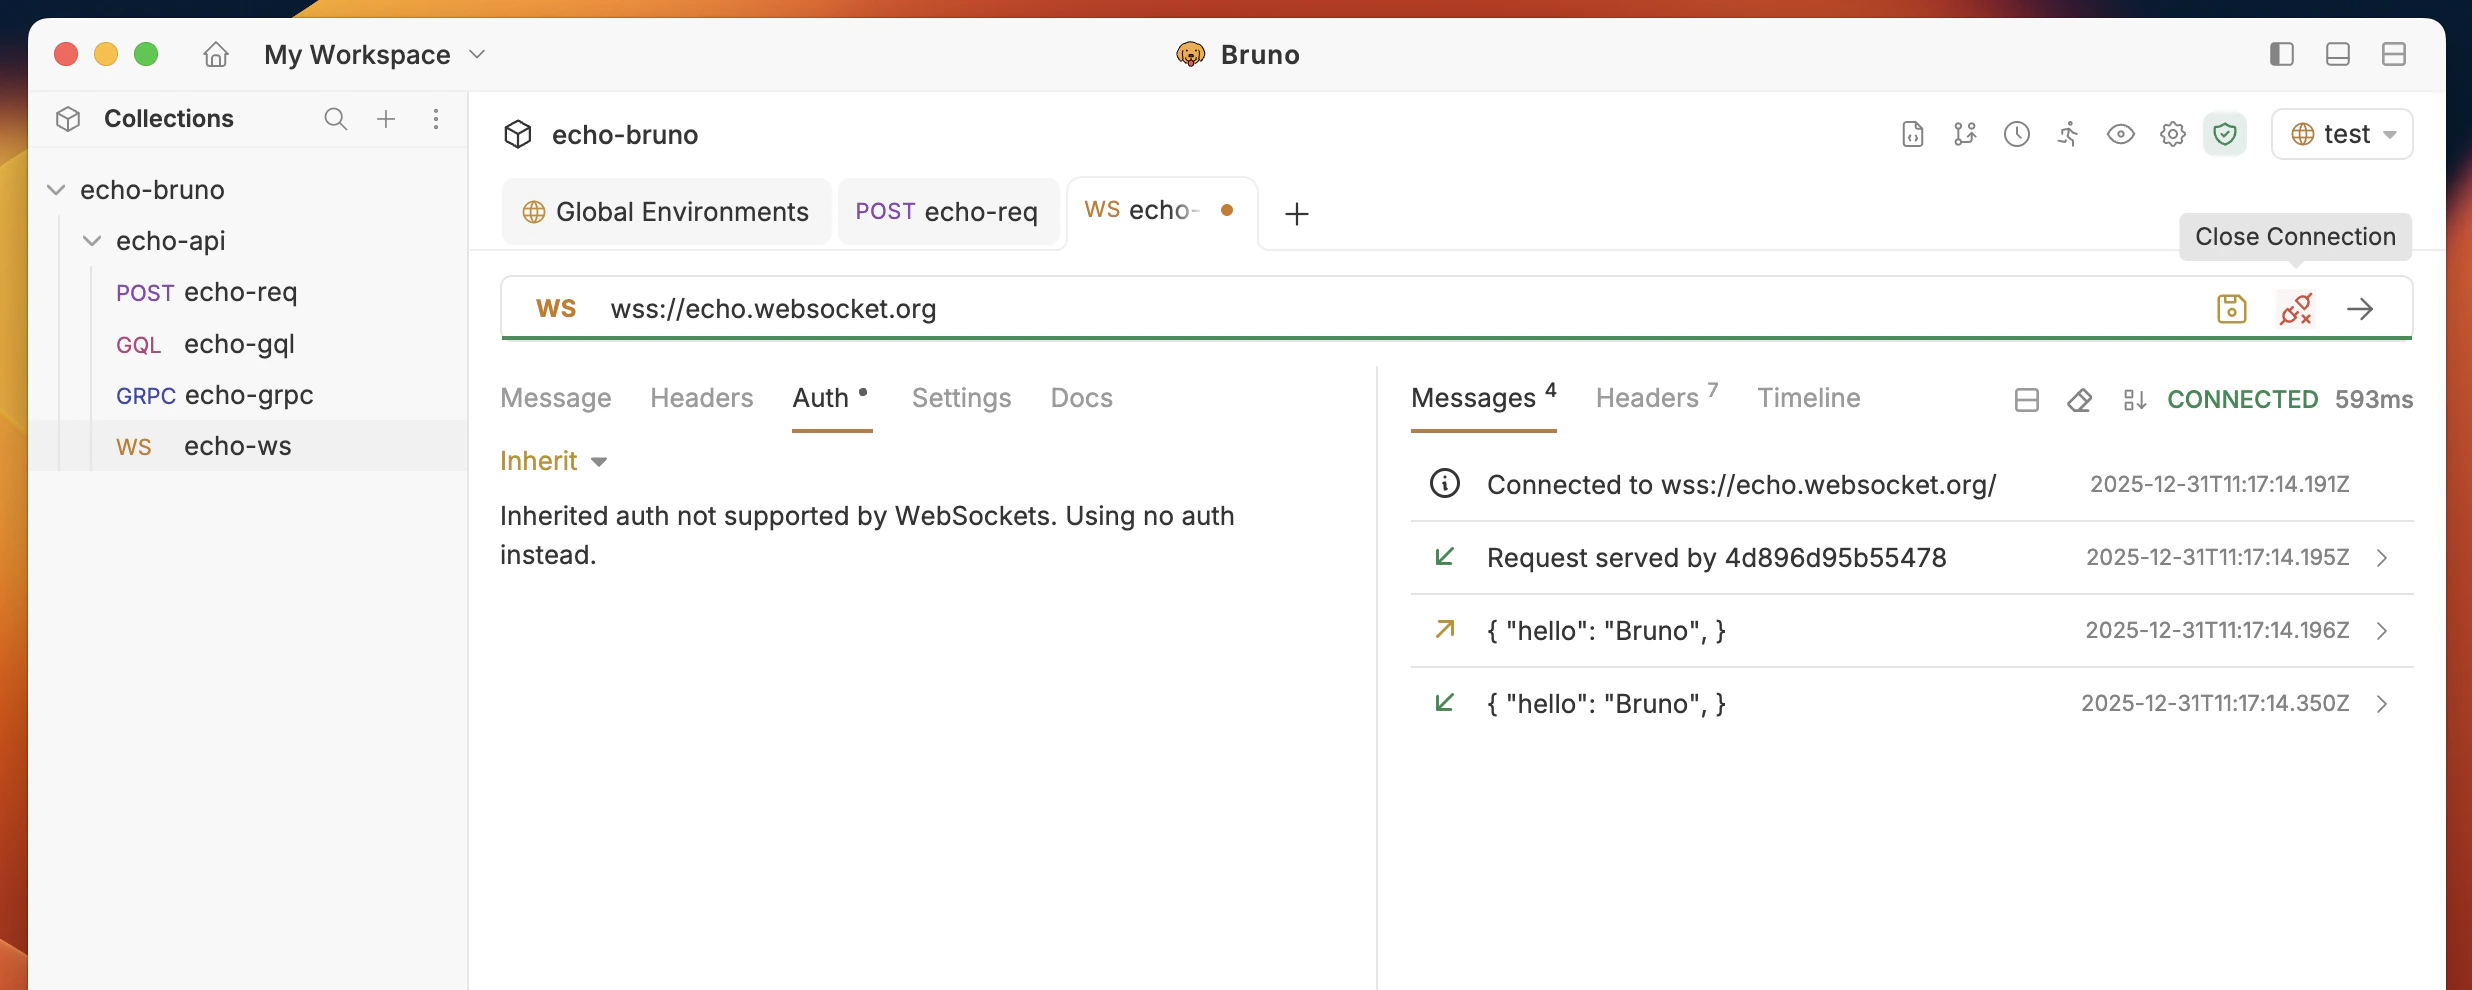
* **Connected**: Successfully connected and ready to send messages
* **Disconnected**: Connection lost or manually closed
### Message Composition
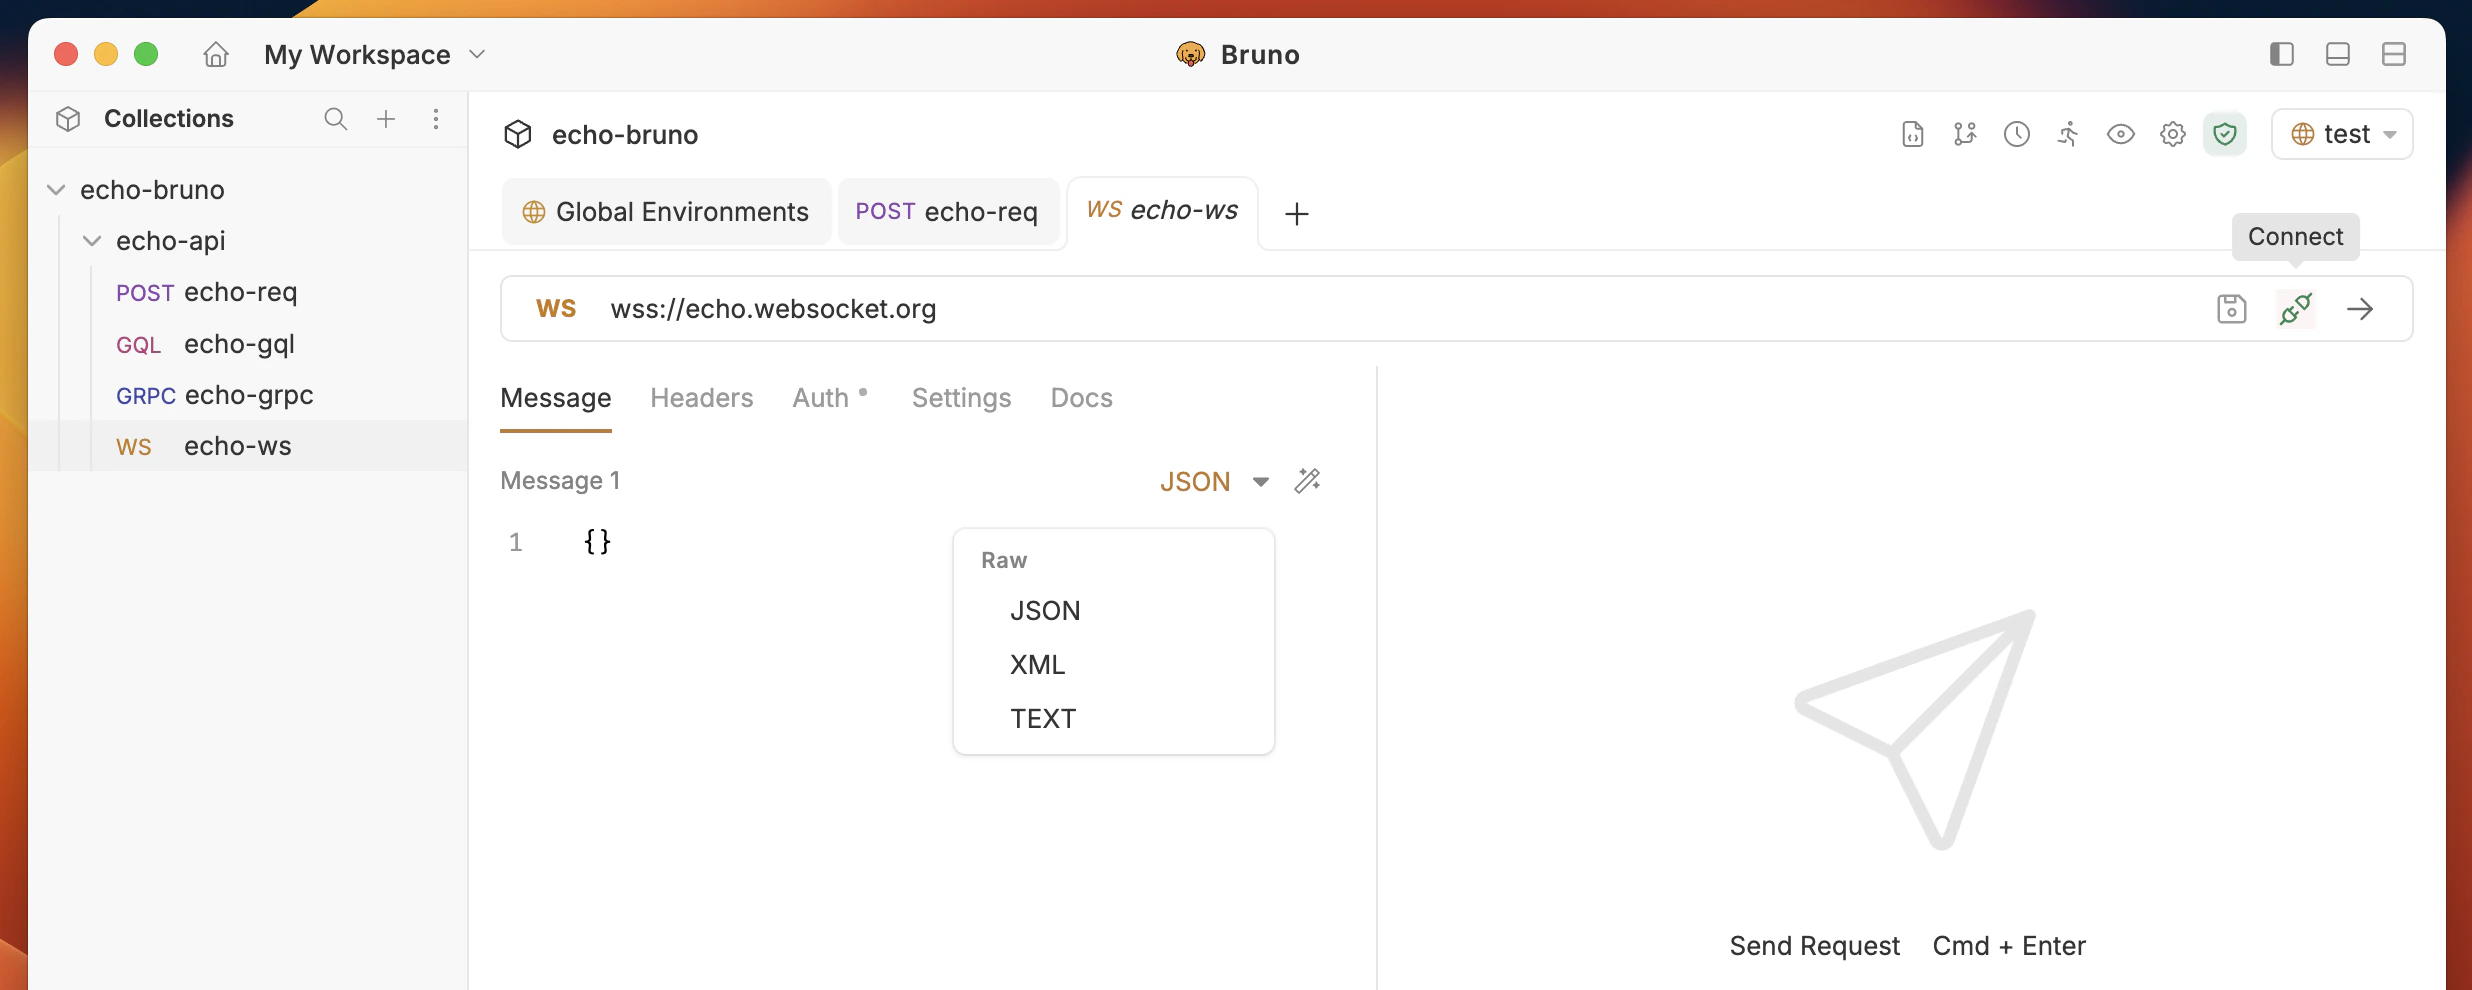
Bruno organizes WebSocket messages as a list of collapsible accordion panels, so you can save multiple reusable messages alongside a single request and send any one of them on demand.
Each message panel includes:
* **Message name**: Double-click the label to rename a message inline
* **Message type**: Switch between Text, JSON, and XML per message
* **Message editor**: Compose the payload with syntax highlighting
* **Send button** (per message): Send that specific message; auto-connects if the WebSocket is not yet connected
* **Delete button**: Remove the message (available when the request has more than one message)
The body tab also exposes two toolbar actions in the top-right:
* **Add Message** (`+`): Append a new message; new messages default to JSON and auto-expand for editing
* **Prettify All** (wand icon): Format every JSON and XML message in the request
The currently selected message (highlighted; others appear dimmed) is the one that will be sent when you click the global **Send** button at the top of the request.
### Message History
* **Sent Messages**: All messages you've sent (marked with →)
* **Received Messages**: All messages received from server (marked with ←)
* **Timestamps**: When each message was sent/received
* **Message Sorting**: Toggle between newest/oldest first
## Connection Management
### Establishing Connection
1. **Click the "Connect" button** to establish the WebSocket connection
2. **Monitor connection status** in the status indicator
3. **View connection logs** for detailed connection information
### Sending Messages
1. **Compose your message** in the message editor
2. **Select the message type** (Text, JSON, XML) for that message
3. **Send the message** in one of two ways:
* Click the per-message **Send** button on a specific message panel to send that message
* Click the global **Send** button at the top of the request to send the currently selected message
4. **View sent message** in the message history
If the WebSocket connection is not yet open, sending a message will auto-connect first.
## Request Interface
### Connection Status
* **Disconnected**: Initial state, ready to connect
* **Connecting**: Establishing connection to server
* **Connected**: Successfully connected and ready to send messages
* **Disconnected**: Connection lost or manually closed
### Message Composition
Bruno organizes WebSocket messages as a list of collapsible accordion panels, so you can save multiple reusable messages alongside a single request and send any one of them on demand.
Each message panel includes:
* **Message name**: Double-click the label to rename a message inline
* **Message type**: Switch between Text, JSON, and XML per message
* **Message editor**: Compose the payload with syntax highlighting
* **Send button** (per message): Send that specific message; auto-connects if the WebSocket is not yet connected
* **Delete button**: Remove the message (available when the request has more than one message)
The body tab also exposes two toolbar actions in the top-right:
* **Add Message** (`+`): Append a new message; new messages default to JSON and auto-expand for editing
* **Prettify All** (wand icon): Format every JSON and XML message in the request
The currently selected message (highlighted; others appear dimmed) is the one that will be sent when you click the global **Send** button at the top of the request.
### Message History
* **Sent Messages**: All messages you've sent (marked with →)
* **Received Messages**: All messages received from server (marked with ←)
* **Timestamps**: When each message was sent/received
* **Message Sorting**: Toggle between newest/oldest first
## Connection Management
### Establishing Connection
1. **Click the "Connect" button** to establish the WebSocket connection
2. **Monitor connection status** in the status indicator
3. **View connection logs** for detailed connection information
### Sending Messages
1. **Compose your message** in the message editor
2. **Select the message type** (Text, JSON, XML) for that message
3. **Send the message** in one of two ways:
* Click the per-message **Send** button on a specific message panel to send that message
* Click the global **Send** button at the top of the request to send the currently selected message
4. **View sent message** in the message history
If the WebSocket connection is not yet open, sending a message will auto-connect first.
 ### Working With Multiple Messages
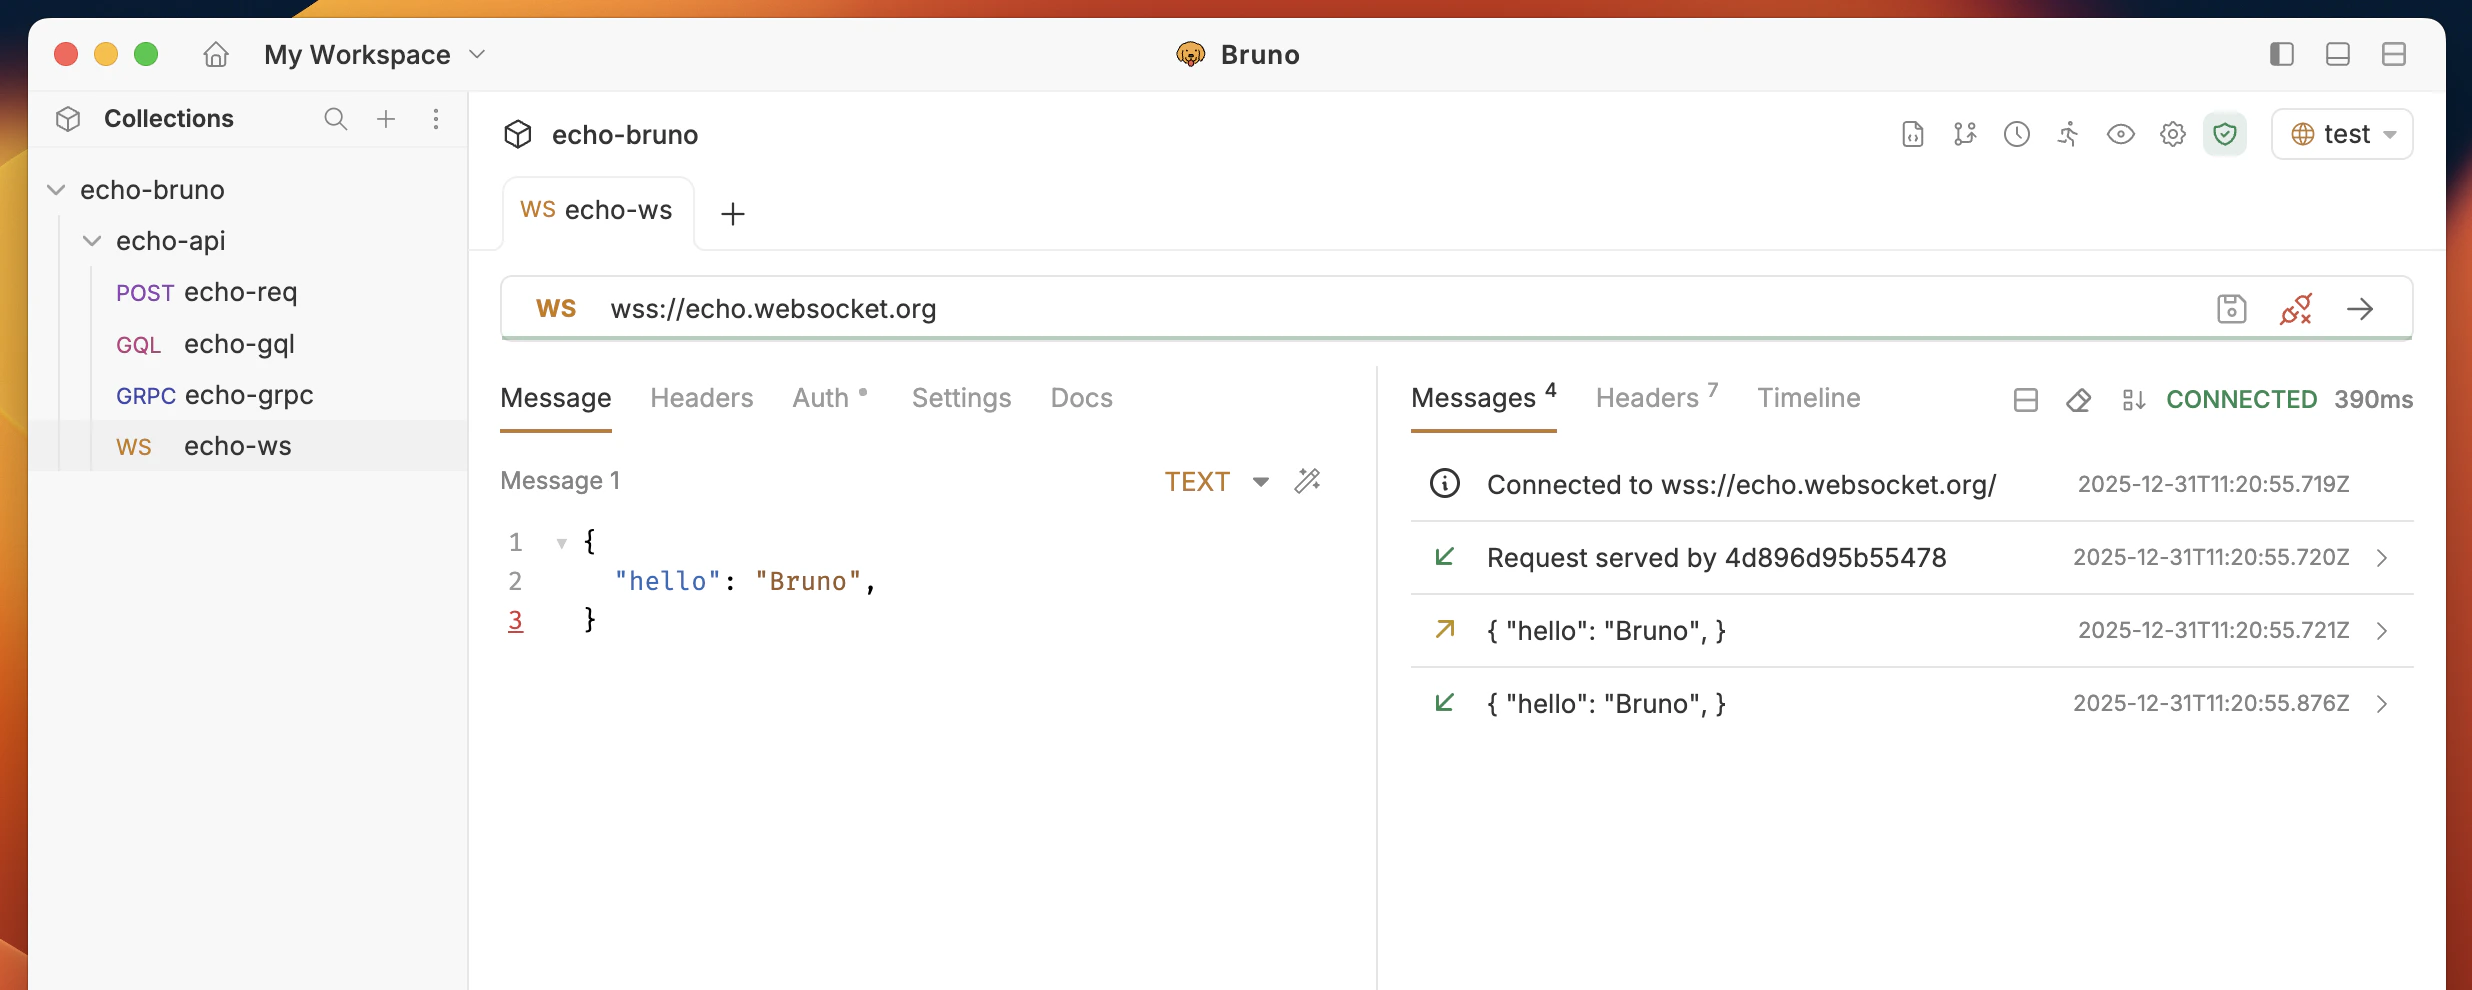
You can store multiple messages in a single WebSocket request, which is useful for testing different payload variants without creating separate requests.
1. **Add a message**: Click the `+` icon in the body tab toolbar (or the **Add message** link if the request has none). New messages default to JSON.
2. **Rename a message**: Double-click the message name in the accordion header and press Enter to save.
3. **Switch types per message**: Use the type selector in each message panel to change between Text, JSON, and XML independently.
4. **Select the active message**: Click any message panel to select it; the selected message is what the global **Send** button transmits.
5. **Prettify all**: Click the wand icon in the body tab toolbar to format every JSON and XML message at once.
6. **Delete a message**: Hover the message header and click the trash icon. The delete control is hidden when only one message exists.
Multi-message support is preserved across both `.bru` and `.yml` collection formats, so saved requests round-trip without losing message names, types, or selection state.
### Receiving Messages
1. **Monitor the message history** for incoming messages
2. **View message details** including timestamp and content
3. **Use test scripts** to validate received messages
### Closing Connection
1. **Click "Disconnect"** to close the WebSocket connection
2. **Connection status** will update to "Disconnected"
3. **Message history** is preserved for review
### Working With Multiple Messages
You can store multiple messages in a single WebSocket request, which is useful for testing different payload variants without creating separate requests.
1. **Add a message**: Click the `+` icon in the body tab toolbar (or the **Add message** link if the request has none). New messages default to JSON.
2. **Rename a message**: Double-click the message name in the accordion header and press Enter to save.
3. **Switch types per message**: Use the type selector in each message panel to change between Text, JSON, and XML independently.
4. **Select the active message**: Click any message panel to select it; the selected message is what the global **Send** button transmits.
5. **Prettify all**: Click the wand icon in the body tab toolbar to format every JSON and XML message at once.
6. **Delete a message**: Hover the message header and click the trash icon. The delete control is hidden when only one message exists.
Multi-message support is preserved across both `.bru` and `.yml` collection formats, so saved requests round-trip without losing message names, types, or selection state.
### Receiving Messages
1. **Monitor the message history** for incoming messages
2. **View message details** including timestamp and content
3. **Use test scripts** to validate received messages
### Closing Connection
1. **Click "Disconnect"** to close the WebSocket connection
2. **Connection status** will update to "Disconnected"
3. **Message history** is preserved for review